If you are an Android lover, you might have the question in your mind, to run Android in you PC also. Then what to do? Android is operating system that runs smart phones now-a-days. Don’t worry. Installing Android in PC is not that tough and does not require bulk technical knowledge.
Just by following some steps, beginners can also do it.
How to install Android on PC:
At first decide which version of Android you want to run on your PC. You can go for latest “Kitkat” also.
Start With:Initially you need download Oracle virtual Box or Android X-86 in order to run your beloved Android OS in your PC.
Click here to get Virtual Box: Download Oracle Virtual Box
Click here to get Android X-86: Download Android X-86.
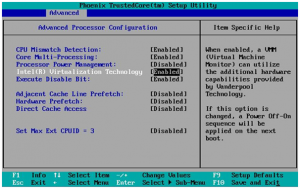
Special Note: You may have to virtualization in your system’s Bios (Image below).
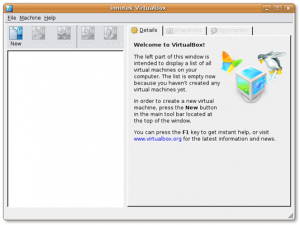
 Install Virtual Box: Once you enabled the virtualization, install Virtual Box and run it. You will see the image (below).
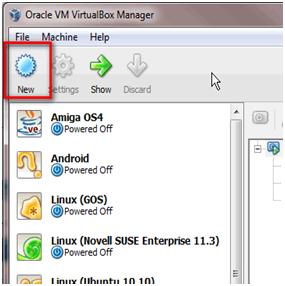
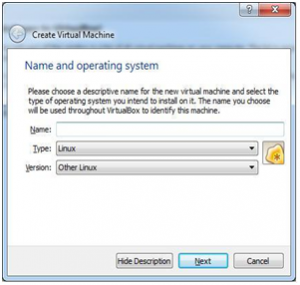
 Create Virtual Machine: Then, click on the “New” tab on the left top of the window and enter a name and off course the details of operating system.
Select “Type” as Linux and “version” as other Linux.
Then click “Next”.
 Allotting RAM for the Virtual Machine: The very next step is to select the RAM size for the virtual machine that you are going to create.
If you are interested to install Android 4.3 or higher, the you need to allot 1GB RAM, but its not necessary all the time. Then select “Next”.
 Create Virtual Hard Disk: Its time to create a virtual hard disk. Once you click on the “Next”, a window will come with three different options. Select “Create Virtual Disk” and select “Next”.
Special Note: Minimum 1 GB disk space is required to install the operating system.
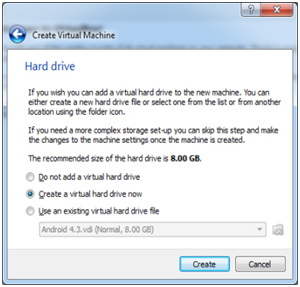
 Then in a new window, you will be shown the types of Hard Drive. Select VDI (Virtual Box Disk Image).
Create space for your new drive (Android): In your very next step you will be asked to allot storage for the Android system. You can select dynamic size also.
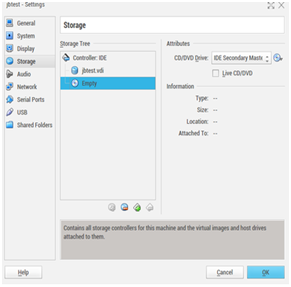
 You are almost done now. You just have to add the location of Android 4.3/ Android 4.4 image file. For that you need to select the “Settings” option in Virtual Box and go next to the “Storage”, just below the storage tree, select “Empty”.
You can see the image of a disk there. Do you? Click on that image and select “Choose a virtual CD or DVD disk file”.
Click on the Live CD/DVD box then click “Ok”.
Start your Virtual Machine: Click twice on your virtual machine. It will start immediately. Just after that click “Ok” on all the dialogue boxes.
Are you done?
Next, you have to start the installation of Android X-86.
Create partitions for Android Installation: Now, you have to create partition for installation of the Android operating system. This will help you not to mess up with the things of your Windows/Mac things.
Once you have created the partition, you have to decide the size of the new partition.
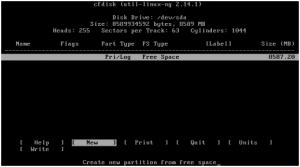 Now, you already have created the partition. Just follow the formalities and save your wish and quit by entering on “Quit”.
The last Step: In the last step, a blue window will appear. Select “sda1” and press the Enter Key. Then select “et3” file and press the Enter key again.
Then two consecutive windows will appear. Select “Yes” and “Ok” for these first two until you reach to the window where you will be asked whether you want to make system directory as read write or not. Select “No” on this.
Android OS is installed in your virtual machine. Select “Run Android 4.3/4.4”.
Wait for a moment; you can see the screen with “Loading Android”.
Select your “Language” and fill your “Gmail” data. Android OS is installed in your PC.
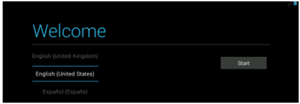 You are now ready to play with Android in your PC. Have fun.