It has always been specified that BlueStacks or similar applications can only be installed on the systems having higher RAM i.e. at least 2GB of RAM. It also demands a proper graphics card in order to run smoothly.
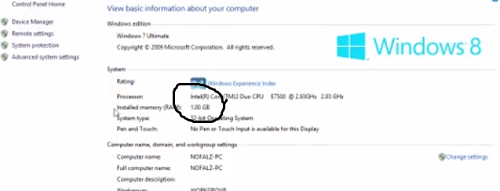
But however there is a possible way to install the BlueStacks in system having RAM of 1 GB. Furthermore it is also possible to install it on systems where you do not have the graphics cards. There is also a particular software called Orca which would indeed help you to overcome the various error messages like “BlueStacks currently doesn’t recognize your graphics card” or “the graphics card needs to be updated”.
All this errors can easily be taken care of by installing the particular software. The software called Orca basically allows you to edit the windows installer packages or the (.msi) files. So you just need to do some minor adjustments and simple editing after which you would be easily install the BlueStacks and that too on a system with 1 GB RAM.
In this article we are also going to provide you with the edited version of the BlueStacks to download in case you do not want to go through the long procedures.
Step 1: Installing the BlueStacks in systems with low configurations
In order to go on with the steps we need to perform two important downloads.
- Download BlueStacks Offline Installer.
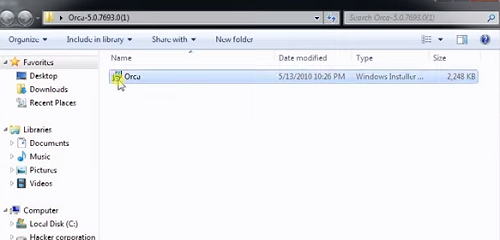
- Download Orca.
So basically you need to download and install the Orca into your computer. You also need to download the BlueStacks online installer before from the following link.
You need to right click on the file of the BlueStacks and then click on the option “Edit with Orca”.
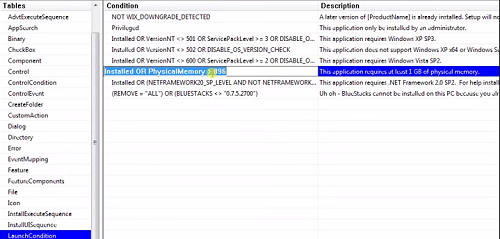
Doing so would open the very window of Orca. Once it is opened you ned to select the “Launch Condition” in the left panel. Over there you need to select the condition “Installed OR PhysicalMemory>=1024”. You need to delete it and then click on OK.
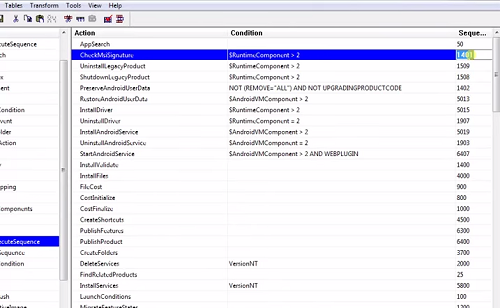
So quite similar to that you also need to select the “InstallExecuteSequence” from the left panel. You need to delete the row with action as “CheckMsiSignature”
After the previous step you need to click on the “Property” from the left panel and then you can click on the “GLMODE” and then change the parameter to false.
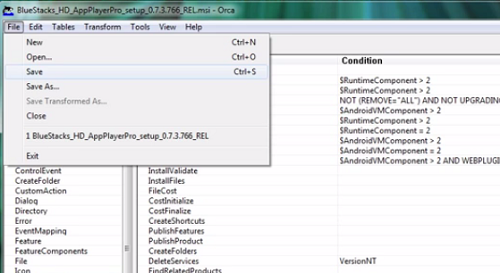
After that you can click on “Save” to save the changes that you have made. After you have already performed all the steps you can just go head and then the edited setup. You would be quite amazed to see that it does not give any more errors. You may also note that this particular solution equally applies to the problem or the error 25000. This problem is basically faced by the Windows 8 and 8.1 users.
Well there is also an alternative method to the process. Obviously if you are not willing to go through all the steps that are being mentioned above you can also download the edited version of the BlueStacks.
Step 2: Installing the edited version of the BlueStacks
As already been mentioned earlier, you can install and download the edited version of BlueStacks in case you do not want to go through the above procedures. So you do not need to do any kinds of changes. You can just download and follow the online instructions.
Download the edited version of BlueStacks.